Tag Archives: burp cloth

New Stuff in My Etsy Shop (And a Coupon)!!

27 Mar

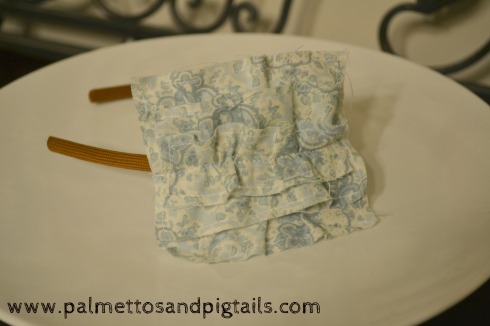
Another shameless plug for my Etsy shop!  In addition to a couple of new burpcloth patterns, I’ve added some headbands too!  And I’ve started making a little doodad which I call a Door Husher.  I literally could not think of a better name.  Please, please help me name the things!!  This little thingy has been a lifesaver in our house.  It allows me to sneak in and out of Amelia’s room without having to turn her squeaky knob, or loudly latch the door.  It’s made out of a thick fabric, and has elastic on either side that goes around the doorknobs.  The fabric sits on top of the latch, and prevents the door from latching…making it easy for me to just gently (and quietly) push open her door.  Comes in very handy too, when I have my hands full and I can just bump the door with whatever is free and it will open!

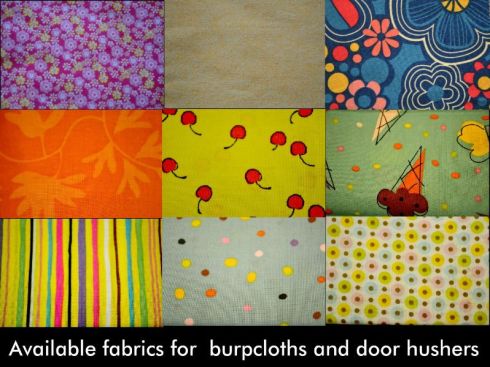
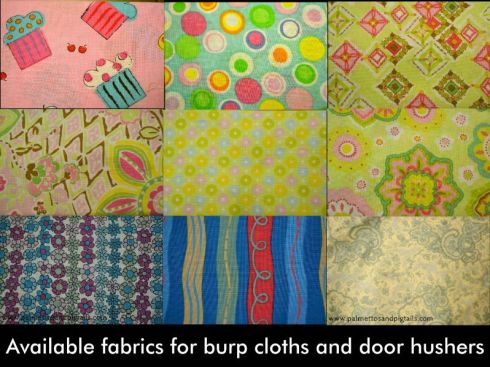
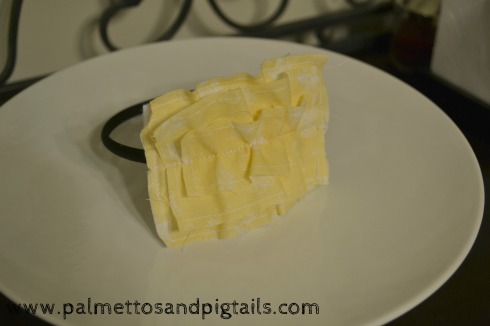
Here are the new fabric choices for the Door Hushers and for the burp cloths….these make great gifts for new moms!!

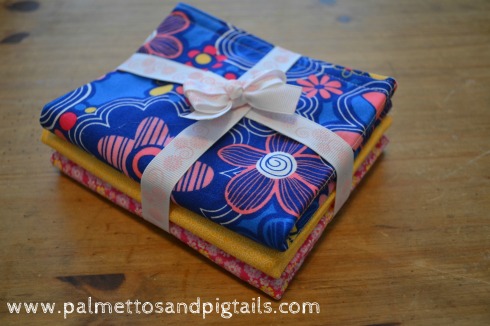
Here is the new burpcloth pack….it’s named Magnolia.  And I was so happy to send one to my new baby cousin Cameron, who was born a couple of weeks ago in GA!!

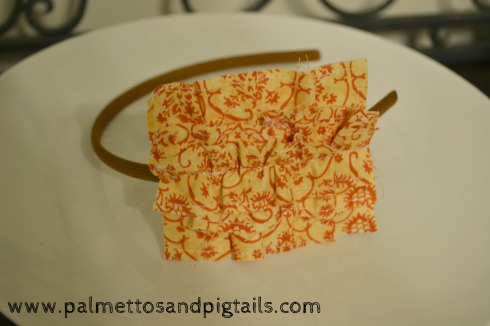
I also sent Cameron’s mom, Heather, a new headband…hopefully it makes her feel pretty and feminine!  The best thing about thm is that they are completely interchangeable…they can fit on any headband, and look great on moms and kids alike.  I just love these…I wear one almost every day!

These are just a few of the choices I have up for sale….check out my Etsy Shop to see the rest!  And remember, I can make custom orders for any of my items, so if you have a specific fabric, color or team you’d like me to feature, just let me know!

Thanks for visiting!  (Tell your friends!!)  Oh, and because you stuck with me til the end of my post, use the coupon code SPRING on your order for 10% off!  Offer good for a limited time…so hurry!

Etsy Store! (Shameless plug)

21 Dec

Well folks, after a lot of pondering, planning and sewing….I finally got my Etsy store up and running.  For those of you who are unfamiliar, Etsy is a website that allows people to sell stuff they have collected or made.  I want to eventually sell dresses and other crafty kid stuff, but I figured I’d start small, with the simple yet extremely cute and functional burp cloths that I make.  I make most of my own for Amelia using a cotton print and flannel lining and backing.  I have some other fancy ones that I’ve gotten as gifts or have bought myself (for waaaaay more than I charge!), but I’ve found that the terry cloth ones just aren’t very soft on baby’s face, and the minky or chenille ones tend to get stiff when wet.  So, I love the flannel.  It’s cheap and when double-ply, is super absorbent and dries quickly, so I can use them all day.  (Which seems gross, I know….but if you’re a parent of a baby fountain, like I am, you know what a pain it is to have to have 6-8 cloths on hand just to run to the store!)

Anywho…..here’s the link…..check it out.  I just have a few posted right now (the ones that are currently made), but I have a ton more fabric, including some more girly prints that I intend on adding after the holidays.  So keep me in mind for any gifts you might need and please pass the word on!

 Here’s a sneak peak of the “Festival of Lights” package…check out my other ones!

Fall Burpcloth and One Ca-uuuute Baby!

15 Nov

This is the centerpiece on our coffee table in our living room.  To me, it’s the perfect type of decor.  Symmetrical candles, simple and easy to clean up pinecones and pumpkins, a little splash of fall color for my living room.  Everything is contained on a white rimmed plate and the cinnamon scent is heavenly and oh-so-Fallish.  It made me want to create those Fall themes on something.  But I had very little time (and frankly, not a whole lot of energy).  So, the most obvious and functional choice for me was to make a burp cloth.

I found some leaf and acorn cookie cutters in my pantry and decided to make use of them.  I traced them onto some fall-ish printed fabric that I had leftover from another project, and used an iron on transfer to adhere them to some flannel that I use to make burp cloths.  Then I carefully and slowly stitched around each shape with brown thread.  In general, I am terrible at doing this…..but practice makes perfect, right?  Here is the template I used, along with the turkey template from this post.

I folded the fabric in half width-wise with right sides touching and sewed all the way around with a half-inch seam.  I left about an inch and a half open at one end, so I could poke the cloth through to turn it right-side-out. (Sorry, I forgot to take a picture of this step!)

I took another scrap of fabric and cut it lengthwise so that it would wrap completely around the width of the burp cloth.  Allow about 1/2 inch for seams.  I ironed the seams and then straight stitched them all the way around.  Then I sewed the two ends together to get a nice clean look.

Wrap the loop around the width of your burp cloth and position into place and pin.

Follow your existing stitching all the way around on both sides.

Then I stitched around the entire perimeter of the burpcloth again about a half an inch in from my original stitch….I think it makes a more finished look and is definitely a lot sturdier.  Then, I folded the burpcloth in half width-wise and ironed a crease.  I sewed a straight stich across the crease.  This helps with bunching when you wash it, and also helps when folding.

After stitching in the middle, stitch the middle of both side of the crease the same way….creating fourths.

Iron the whole thing and stick it in the wash.  And tada!  You can be festive while getting spit up on! =)

Here’s where I’m linking up this week!

Newborn Matching Outfit

3 Aug

Good morning!  We are so excited today because it is our last day of swim lessons!  Don’t get me wrong….we love to swim.  But unfortunately the swim lessons we enrolled in were less than stellar and have messed with our whole schedule the past two and a half weeks.  They were from 12-1 (naptime) and were a half an hour away from our house.  I didn’t even take any pictures because the pool was disgusting!  The swim lessons teacher was 16 years old and purely a lifeguard, while the three of us moms fended for ourselves attempting to teach our kids…not even knowing where to start!  But I’m happy to report that Jayna is able to dunk her head under water while blowing bubbles, paddle with arms and feet while I hold her around the waist, and jump off the side to me!  That’s about all we could handle without any direction!  But, I can’t complain because we only paid $30 for the whole session…but needless to say, we’ll be swimming elsewhere from now on!

In other news, I spent the evening completing a bundle of burp cloths (in between Braxton Hicks contractions!).  I also decided that I’d like to splurge on some in-hospital professional pictures of Amelia and Jayna.  So of course we’ll need matching outfits for them!  I decided to complete the set I made for Jayna and Lulabelle, with a little onsie, burp cloth and bib for Amelia.

I started with the burp cloth, and made it like I usually do by cutting the fabric and the flannel to the size I wanted and matching up the wrong sides and sewing together.

I also like to sew a double seam for durability.

And I also fold it into thirds, iron the creases, and then sew a single stitch down each crease.  This helps with bunching when you wash it, and gives you a little guide to fold it.

Then I decided that a pillowcase dress was unrealistic for a newborn, and a onsie would be better.  I hand drew a daisy on the fabric, used an iron-on transfer to get it to stick to the onsie, and then I hand-sewed red stitches around it.  I was aiming for it to look a little ragged…I think I succeeded!

And finally, I decided to add a bib to the outfit.  I traced a newborn bib that I already had to get the size and pattern right, and then added another inch around the edge to account for the seams.  I matched the right side of the fabric to two layers of flannel, and placed piping around the raw edges.  I sewed around the piping before layering the back of the bib (fabric again, with the right sides together), and then sewed over my original stitching.  Don’t forget to leave a 2-3 inch opening so you are able to turn the bib right-side out!

Then I added velcro.

And tada!  A super absorbent spit bib for a newborn!

All in all, I’m pretty pleased with the way they came out, and can’t wait to see how the pictures come out when Amelia arrives!

P.S. I linked up with these linky parties today…take some time to check out what other people have been working on this week!

Photobucket

Strictly Homemade Tuesday

Nothing But Country

Photobucket

NightOwlCrafting

Photobucket

Homemade Burp Cloths

27 Jul

Howdy y’all!

Since I have to pack boxes instead of nesting to prepare for Baby Amelia’s arrival, I decided to kill two birds with one stone this week and get rid of some scrap fabric and fat quarters I had lying around and make Amelia some new burp cloths!  I love how fat quarters come in coordinating patterns and colors, and I can usually make 10 out of them for about $10.  Sometimes I’ll do one burp cloth and a matching bib too.  A super easy (and quick) handmade gift for an ALWAYS appreciative Mommy-to-be!  Here are a couple of sets I’ve made recently, some to keep and some to give away!

Hope you enjoyed!  Come back tomorrow to see how else we have been preparing for Baby Amelia!

Today I joined Night Owl Crafting’s Linky Party…..click on the icon below to see what everyone else has been working on this week.

NightOwlCrafting

Betsy…check out #64 Zoo Animal Cupcakes

Mom Mom…check out #97 Grilled Pizza

Love y’all!