Tag Archives: Cooking

Spinach, Spinach, Everywhere: A Recipe for Pesto

22 Mar

I love Costco. I could just wander around in there for hours, and quite often…I do!! I always go in with the best of intentions of buying a bunch of healthy stuff in bulk….thereby forcing myself to fix healthy dinners for my family every night. But usually, I buy all those goodies, and then they go bad before we can eat them. Case in point: Spinach. I always look at the spinach from Costco and think it will be just enough for 4 or 5 big salads. But after 6 meals with spinach…we are spinached out and it doesn’t even look like we made a dent! And the leaves are already starting to get slimy!

So I turned to my February edition of Southern Living (Oh! How I LOVE that magazine!). Ans they happened to have a recipe for spinach-based pesto. Perfect! And I can freeze it too. Well, I made a few tweaks, so here is my version of Southern Living’s Spinach Pesto.

Ingredients:

2 cups of spinach leaves
1 tsp dried cilantro
1 Tbsp fresh chopped basil
2 Tbsp lemon juice
1/2 c to 3/4 c grated Parmesan cheese (to taste)
1 garlic clove
1/4 tsp salt
1/4 c olive oil
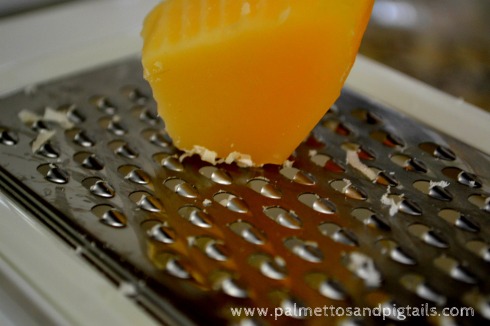
1. Shred your Parmesan cheese. I actually only used 1/2 c in my recipe, but you could go up to 3/4 c if you like a creamier, cheesier pesto.

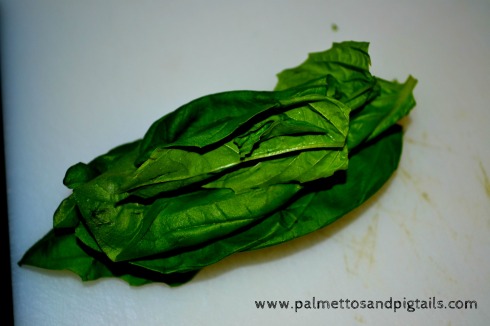
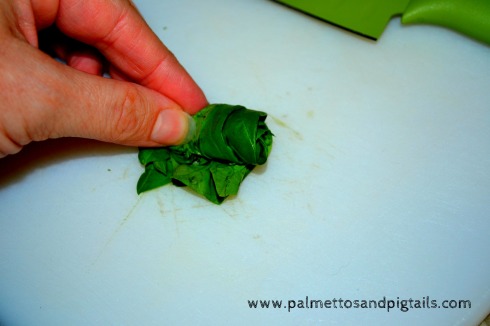
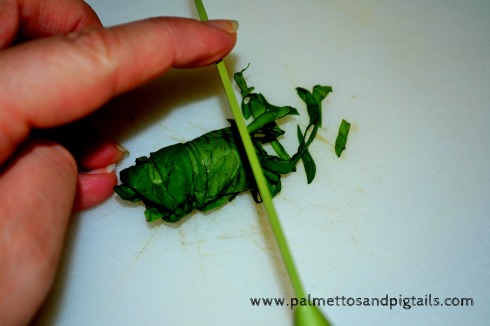
2. Chop the fresh basil…I used the chiffonade method, which involves stacking the basil leaves, rolling them up and then slicing the rolls.

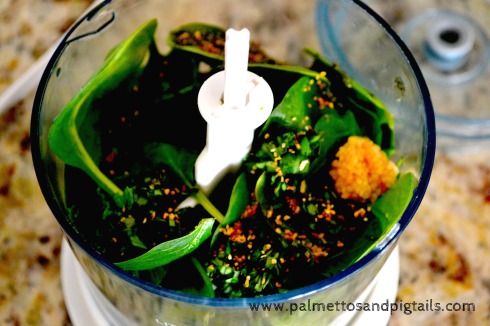
3. Combine all ingredients except for cheese in a food processor (or in a baby food maker, like me!). Add cheese slowly to mixture, blending until smooth.

4. Store in airtight containers. Use with pastas, vegetables, bruchettas, or other appetizers.

Enjoy!

Pizza FAIL

11 Jan

I was in the mood for pizza, but didn’t feel like shelling out $15 and ride all the way into town to get a “fast food” one.  So I decided to be healthy mama and make our own.  I mean, I have done this before….how hard could it be?

We cut up and separated some onions and green peppers.

We pre-baked the crust for 5 minutes.

I didn’t have any marinara sauce, so we decided to  use up some leftover Vodka Sauce instead (yummy, by the way!).

We sprinkled handfuls of cheese on top.

And in between bites of raw onion (yes, my child is weird), topped it with the veggies.

And we baked it for 15 minutes on 400.

Not done.  Back in for another 5 minutes.  Still not cooked in the middle.  Back in for another 5.  The outer crust is getting too crispy.  It will have to do.

The center was “technically” cooked….but way to soft to hold all of our toppings.  I won’t lie to you….it wasn’t pretty.

But after sliding the slices on the plates….and piling the toppings back on afterward (they slid off in the midst of transfer), it was actually pretty tasty.

So, note for next time….make sure the middle dough is a little crispier during that initial 5 minute cook, before attempting to put loads of veggies and sauce on!

P.S. I’m linking up this week!

Christmas Wrap Up

30 Dec

Merry Christmas!  I hope everyone had a safe and happy holiday weekend.  Our celebrations continue this weekend as we ring in the new year at not one, not two, but three New Year’s Eve Parties!

But first, I wanted to check in with you and tell you a little about our Christmas.  The weekend began on Thursday afternoon, when Mom Mom and GP arrived from up north.  After Amelia’s 4 month check-up, we met them in town and had a quick lunch before heading back to the house for naps.  On Friday, Dave and GP did a little fishing on our pond, while us girls started on the baking.  First up, Christmas cookies!

Obviously, Jayna did the majority of spoon licking and decorating.  Eat at your own risk, Santa!!  Next up was a gingerbread house.  But not only do we not like gingerbread, we also shutter at the thought of conformity! =)  We opted to try a rice krispy treat house instead.  Adorned with mint M&M’s, sixlets and Mike & Ike’s stuck on the roof with melted chocolate, we discovered that rice krispies work just as well!  The only disappointment was that our graham cracker roof just wouldn’t stay pitched…..so we opted for The Flintstone’s model instead!

After the girls went to bed that night, Loo Loo, Mom Mom and I stayed up late tidying up and finishing last-minute Christmas decor.

That’s right…you see more recycled pumpkins, and the two Christmas trees were handmade by yours truly, but I got the ideas here and here.  Like I’ve said before, I’m not a very creative person, but I’m an excellent copycat!!

Saturday morning, 9am.  Our doorbell rings with our first of many guests for our first annual Christmas Eve Brunch.  Growing up, my family went to a friend’s annual brunch to gather with friends, do crafts, and put in last-minute requests with Santa.  It’s one of my favorite Christmas memories, so we decided to duplicate it and start it as our own tradition this year.  We invited friends and family from our Sunday School class, as well as our neighborhood.  Although we anticipated mixed results being that it was Christmas Eve, we ended up with about 30 people coming for breakfast!  The kids decorated foam gingerbread children and decorated our felt Christmas tree, while the adults mingled around coffee and breakfast casseroles.  Around 10, the doorbell rang yet again, and Santa made a quick appearance for the children.  After he head back to the North Pole, families headed out to spend the days together and participate in their own Christmas traditions.

Later that night, Sue Sue and Papaw joined us to fry a turkey for dinner and then we went to the early, kid-friendly church service. Our tradition on Christmas Eve is that the girls get to open one gift (from Ralph, our elf), a new pair of pajamas.

This year, Loo Loo must have thought the adults were going to feel left out, because she found us some new pajamas as well!

I won’t mention any names, but some of us were more comfortable in our footie pajamas than others!

Then, we all knocked off early…After all, everyone knows Santa can’t come until everyone is in bed!  The next morning, Jayna was up at the crack of dawn (to be expected), but was more interested in watching Little Einsteins than checking out what Santa had brought.  So we all took our time getting dressed and finally made it downstairs.  Jayna’s first reaction to the bean bag chair she had wanted soooo badly?  “It’s not purple!!”  We’ll be talking about being grateful next week!!  Nevertheless, the unwanted green color didn’t faze her…

And after opening an elephant shaped pillow and blanket (that matched Loo Loo’s), she was all set…no other presents necessary!

Jayna didn’t quite get the “open all of the presents” expectations.  She would open one, take it to her playroom, and we wouldn’t see her for a good ten minutes…..its like she wanted to enjoy just that gift for a little while before opening the next! We had to beg her  to finish opening so we could clean up and get started on fixing supper!

Even the panda slippers she received from Santa got a good ten minutes from Jayna (but she had to take off her footie pajamas in order to fully enjoy the pandas!).

It was a wonderful, laid back day…and the guys made Lowcountry Boil while the ladies drank coffee and nibbled on the ginormous fruit and cheese spread we had put out…not to mention the Overnight Coffee Crumble Cake I made (this recipe is a KEEPER!!!) Yum! Hope you enjoyed my quick synopsis of our weekend festivities….and thank you to our family afar for all of the lovely gifts!  Here’s a little sneak peek of something you will be getting in the next week or so!  Happy New Year!

Halloween at Hundred Oaks

30 Oct

Last night was our Fifth Annual Halloween Party.  Now, if you don’t know much about me and Dave, know this.  We LOVE Halloween.  Well, really all things Fall.  I mean….my birthday, a cool relief from summer in the south, changing leaves, hayrides and bonfires, pumpkin patches, and HALLOWEEN.  What time of year could be better?!?!?

We love Halloween so much, that we have spent a small fortune on our parties….food, costumes and decor.  We’ll start with the costumes.  We spend so much time on decorating and cooking, that we usually kind of forget about our costumes until the last minute, and have to resort to buying your stereotypical couple costume.

Last year we attempted to get a little creative and piggy-back off of the Tiger and Elin scandal.

This year, we wanted to incorporate Loo into our costume….and we couldn’t afford all the face paint again! =)

And every year, we have a costume contest.  All the guests vote for the Funniest, Most Creative and Best Couple Costumes.  Winners get Halloween themed wine courtesy of World Market.  Here are some of our favorites through the years:

And our winners this year…

We always prepare enough food for a small army…and although people seem to eat the entire time, we always have a ton of food left over!  This year I added my zucchini muffins and some mummy and pumpkin cake pops.

Admittedly, we go a little overboard on decorations.  In fact, we get so into them, that we have to specifically put on our invites that children aren’t invited because our house is too scary!  We start on the friendly decor about a week before the party, and then send Jayna to Sue Sue and Papaw’s on the Saturday of our party and spend the entire day outfitting our home with bloody corpses,

Hollywood Horrors,

Ghosts, Gouls and Goblins.

We have a blast rearranging our dining room into a scientist’s lab, and last year, had a haunted maze in our garage that guests were required to walk through to get into the party.

But Hannibal is definately the scariest prop as far as I’m concerned….he is sooooo life-like.

And somehow he manages to pop up in different corners of the house every Halloween and scares the you-know-what out of me!  So Dave decided to capitalize on that this year, and put him in the bathroom!  Guests got a double dose of Hannibal as they saw a glimpse of him in the mirror as they walked into the bathroom, and then were forced to stare at him as they did their business!  What kind of sick-os live here anyway?!?!

But, I am exhausted as we have been planning our shin-dig for the past few weeks and were up late last night and up early this morning attempting to clean up before Buggy arrived home.  So, I’m off to bed for tonight….to dream about tomorrow!  Happy Halloween!

Monster Cake Pop Tutorial

27 Oct

Hello, my faithful followers!  Sorry it’s been awhile.  We have been cRaZy busy these past few weeks, unpacking the last of the boxes and getting ready for the Halloween season!  Our annual party is this coming Saturday, so we are working into the wee hours each night getting the house, food and costumes ready.  Don’t worry, you’ll get to see pictures!

In my spare time, I’ve learned how to make cake pops.  And, if I do say so myself, I’m quite pleased with my first attempt!  I decided to make some practice pops before attempting the real deal (Mummies and Jack-o-Lanterns) for the party.  So I made some little green monsters for Jayna’s class party.  Here’s a quick tutorial how to make them!

These monster pop ideas and how I learned to make them came from this awesome book (that I found at  Lowes, of all places!!).  The recipe is adapted from the book.

Ingredients:

1 box of cake mix
1 can of frosting
1 bag of candy melts (in whatever color you want your monster to be…I used green)
1 tube of white decorative icing
1 tube of black decorative icing
1 tube of decorative icing in the same color as your monster
1 tube of decorative icing in whatever color you want your eyes to be (I used orange)
1 bag of paper lollipop sticks
1 block of styrofoam
1 microwave safe bowl
*I got my materials from Publix (icing) and Michaels (everything else)
 

Recipe

1. Bake the cake according the box’s directions.  Let it cool completely before doing any of the next steps.

2. Carefully slice off any brown crust off of the cake and place on a plate to munch on.

3. Place the rest of the cake (the yellow part if you used yellow cake mix) in a bowl and crumble it into fine crumbs.

4.  Mix about 1/2 to 3/4 of the jar of icing into the cake crumbs.  And using the back of a metal spoon, mush it together until its about the consistency of raw cookie dough.

5. Using a melon baller (to make all of your pops an even size), scoop out little balls and then roll them with your hands to make them completely round.  I placed mine on a parchment papered plate that I knew was small enough to fit in my freezer.

6. Let your 2 year-old sous chef lick the spoon (after you taste test it as well!)…remember everything is already cooked, so it is perfectly safe!

7. Place your cake balls in the refrigerator for a couple of hours.  Or, if you are a normal person and don’t have room in your refrigerator, or a couple of hours to wait for these little things, stick ’em in the freezer for about 15 minutes.  They will not freeze completely.  If you don’t have time to finish the recipe, you can also stick them in a ziplock bag and freeze them for later.  Or, until your hubby finds them…then there might only be 4 left.

8. When you are ready to decorate, let the balls sit out on the counter for a couple of minutes to warm up a bit.  I found out the hard way that the balls expand a little as they warm up, so if you dip them in chocolate too soon, they will crack!  No worries for this particular recipe though, as you can just cover the cracks with icing.

9. Dump your chocolate melts into your microwave-safe bowl and microwave them in 30 second intervals until the chocolate is completely melted and drips off ouf your spoon.  This usually takes me three 30-second intervals.  Don’t over heat it…your chocolate will clump!  If you need it thinner, add a little vegetable oil (just a splash) to the chocolate and stir it for a good minute or so.

10. Dip the end of your lollipop sticks into the chocolate and then stick it in the middle of each cake ball.  This will help keep the ball on your stick.  Put the stick with the ball on the end into your styrofoam and pop it into the fridge for about 5 minutes to let it harden.

11. Dip your cake balls into the chocolate one by one until they are completely covered in chocolate, then stick them back into the styrofoam and back into the fridge.  I let them stay in there for a good 20 minutes or so to get the coating nice and hard.

12.  Notice the crack on the right cake pop above.  No worries.  Take your tube of icing that is the same color as your cake pop.  Draw squiggles all around the ball and then kind of dab and them to make them look really messy.  Make sure you cover up any cracks.

13. Stick them back in the foam and back in the fridge for about 5 minutes to let them harden a little bit.  Then, using your tube of white icing, draw a large circle and color it in white.  Or, draw two little dots.  Back in the fridge for 5 minutes.

14.  Draw a slightly smaller circle on top of the white circle with your eye-color tube of icing.  Then use the black to make a small dot (the pupil) in the center of the color.  Or, if you have two white dots, just use the black icing to put pupils in the middle of the white.

Is it just me, or do these look like Oscar the Grouch a little?!?

Tada!  You are done!  I put mine back in the fridge overnight to get the icing nice and hard, because the next morning I stuck them in little baggies to take to Jayna’s school to hand out at her party.  Mmmmm….heaven in a bite!

I linked up!
NightOwlCrafting

Photobucket

Guest Blogger: Betsy’s Baby Cupcakes!

22 Aug

As y’all probably know by now, little Amelia has arrived.  So, not that you aren’t important to me, but we have shuffled some priorities around this week as we get settled as a family of four and entertaining family who have come to support us!  Don’t worry, I’ll be back soon….in the meantime, please enjoy some Tutorials!  The first is written by my besty, Betsy (say that five times fast!).  Enjoy (and feel free to bring me some of your yummy cupcakes!!) =)

Hellooo!  I’m so excited to be a guest blogger here this week.  If you are a regular, you may know me as the mommy of Jayna’s little pal, Lulabelle, who pops up regularly in these blog posts.  I am Betsy, Shara’s very most favoritest friend from her olden days in Maryland.  I have had the pleasure of knowing her for about 15 years now, and my hubby has known her even longer, as we all met in Sunday School and youth group at our church in Laurel, MD.  I love art and making things, my large/crazy extended family, and my small/sweet immediate family, God and my church, and I have the biggest sweet tooth of anyone I know!

In the past couple years, I’ve found some ways to combine my love of art and sweets.  In college it started with painting baked goods (donuts, cupcakes,
cakes)…

…and has since morphed into making edible creations (fancy cakes and cupcakes).  I still love to paint, but it’s so rewarding to have someone bite into your creative project and devour it!  And to be honest, not many people (including my husband, who I happen to live with) want a bunch of donut paintings hanging in their houses, so they end up taking up a lot of space in the junk room…not so with cake and cupcakes!

Here’s one I made for Buggy’s 1st Birthday Party:

Here’s another one I did for a tea party-themed birthday:

Please come visit my Facebook Page, Betsy’s Cakes to see more of my favorite creations!

Alright, so in honor of my new, absolutely wonderful, blessing of a 2nd god-daughter, Amelia, I’m going to make Cute Baby Cupcakes!  Heartfelt congratulations to Shara, Dave, and Jayna!!!  These cupcakes are great for baby showers.  I also made them recently for a thank you to our beloved nursery workers at church, with a cake to go along and display my thank you message.

I love to try new recipes from cakecentral.com and tweak them to my liking.  That is an awesome website for cake and cupcake makers – novice and genius alike – with forums to ask questions and recipes galore.  For today’s Amelia cupcakes, I’m going to go with a chocolate chunk cake and cream cheese frosting, but one of my favorite things about these cupcakes is that you can go with any flavor, thanks to the decorations.  For example, I LOVE chocolate frosting, but with a lot of my cupcake orders, the customers want a frosting color dyed to match the theme of the party and chocolate does not work for that…with these ones, you can make your baby blanket any color to match the party and still have your yummy chocolate underneath.

So first, choose a flavor and bake your batch of cupcakes.

While they are baking, you can get started on your decorations.  Now, I love to work with fondant… its like a dream come true to get to play with PlayDoh again for me as an adult, and the fact that its edible and dyeable is just awesome.  But some people hate it.  Its verrrry sweet to actually eat, and its a little temperamental to work with, but I love it and think the look of the end product is definitely worth the work.  If you are totally scared of or against fondant, I’ll give you another option at the end of this.  🙂

Confession:
I don’t make my own fondant.  If you want to try, there are great recipes on cakecentral.com, but for me, it’s just too time-consuming and too uncertain (consistency wise)… I buy Satin Ice brand at a cake supply store or online (cheaper).  It’s a good middle-of-the-road brand, not insanely expensive, but a great product.  Michael’s and all craft stores sell Wilton fondant.  Wilton’s alright for this project, and for just starting out with using fondant, but it’s not good for covering a whole cake, and it doesn’t taste very good… I’m just not a fan.  I’ve also seen Duff Goldman from Ace of Cakes has a new product line out.  I haven’t tried it, but price-wise it seems to fall in between Wilton and Satin Ice, so it’s probably similarly in-between in quality/taste — give it a shot if you don’t want to bother trying to find my Satin Ice brand.  There’s no magic formula for how much you need per project (that I know of anyway) but I’d say 2 lbs would be plenty sufficient for this project with a batch of 24 cupcakes.  Fondant comes in many colors, but it is easiest and cheapest to just buy white and dye it to your liking unless you need a really dark or really bold color.

To dye it different colors, you want to purchase gel food coloring.  Wilton brand of these at any craft store are actually great and the best deal (super cheap even).  A little bit of gel coloring goes a looong way, so buy the smallest containers they have and just get the basics – red, blue, yellow, and black, plus a brown.  While you’re at the craft store, also think about buying a black food coloring/edible marker for the eyes and mouths of the babies (you can do these with just the black food coloring gel, but it’ll make your life easier to get a marker).

Alright, so let’s get to work on some cute, edible babies!

1. Take some of your white fondant – start with maybe a baseball sized glob – of it and work it with your hands, add another baseball sized glob and continue
kneading.  Add a little bit of yellow and red gel food coloring to it using just the tip of a toothpick.  Knead all of the coloring in, folding it and squishing it a lot, just like PlayDoh.

*If your fondant gets dry and cracky, mix in a little dab of Crisco or shortening.  If it gets sticky, put a little cornstarch on your hands*

Add more yellow or red as needed in very small increments — you don’t want to end up with an orange, fake-tan baby — I like a pink tone.  You can also play with adding a little brown if you feel your skin color needs it.  To make the dark-skinned babies in my Nursery Worker Thank You Cupcakes, I used
actual brown fondant rather than trying to dye it.  You can also use softened Tootsie Rolls instead of brown fondant!

2. Once you have a skin color you are happy with, break off a chunk a little larger than a quarter, and roll it into a ball in your hand, and then flatten a little
bit.  Keep your extra fondant wrapped up in Saran Wrap if possible while you do this – it can dry out very quickly and if it gets hard and dry its pretty useless and can’t be brought back from the dead.  Put your first head on a cookie sheet (you may want to sprinkle your cookie sheet with a little cornstarch to make getting the heads off later easier) and then continue pulling off similar sized pieces of fondant and rolling them into balls and placing on cookie sheet until you have enough for all of your cupcakes.  Make an extra one or 2 heads for possible blunders(!) but don’t use up all of your flesh-colored fondant (we still need a little for hands, ears, and noses).  Pop them into the fridge.

Check on those cupcakes if they’re still baking, or breathe in the sweet aroma of cake in your kitchen if they are now cooling.  Ahhhh….

3. Pull off pea-sized pieces of your flesh-colored fondant for each hand, so 2 per number of cupcakes you have.  Roll each into a little ball and then flatten it
just a little.  Use a knife or toothpick to make 3 little lines along the side of each one, to represent fingers.  Set each pair of hands near each head so you
don’t lose track of how many you’re supposed to have!

4. Now you want to get out a little cup of water and a small paintbrush (or a q-tip will work) and get your heads out of the fridge.  Dab each of the now chilled
heads with just a little bit of water in the middle of each face.  Pull off teeny tiny pieces of your flesh fondant and roll into a little ball, and then pop each onto the moistened face one by one.  The water makes the fondant sticky, and sugar will bond with sugar when wet.

Do this for each face, then go back and dab each with water on the sides where ears will go.  Again pull off teeny pieces of your fondant to form ears.  You can be ambitious and try to make half circles, but in reality if you just make them into little balls, they’ll squish to ear-resembling things once you stick them on the moistened spots of the heads.  Pop in fridge to set up the bond.

5. Draw the eyes and mouths on, using either a black food-coloring marker or a small paintbrush and black food coloring watered down with a little bit of clear
alcohol.  (You can use water if you don’t have any alcohol, but it will take a lot longer to dry, so be extra careful not to smudge an eye as you pop your heads on your cupcakes.)

If your kitchen is warm, you may have to do this step in shifts, popping your cookie sheet of heads back in the fridge to cool periodically because fondant starts to sweat (condensate) when it goes from cool fridge to warm kitchen, and your food coloring won’t stick very well if your heads are sweating.

6. Frost those yummy smelling cupcakes.  I like a lot of frosting, and again because these decorations cover up your frosting almost entirely, don’t worry
too much about the look of it.  Many people won’t eat the cute fondant decorations at all, so you want them to have a normal amount of frosting underneath any decorations.

7. Pop each head onto each cupcake, making some looking up at you and others facing the side… Half of the babies will be on their backs with a blanket on them and the other half will be peeking out from under a blanket as if on their bellies.

8. Place about 3 chocolate chips, or a little extra fondant, or a Tootsie Roll, or any little candy, along the cupcake coming down from the head where the body
would be.  This just creates a little height under each blanket.  Pop them all in the fridge.

9. Now, let’s move on to some baby blankets.  Take some of your original white fondant – again I like to start with about a baseball sized glob – and knead it,
then add some gel food coloring of your choice.  Once you have a color you’re happy with, sprinkle a clean surface area with cornstarch and roll out your
fondant to a thin sheet  ~ 1/16” to ⅛”.  Use a knife or a pizza cutter to cut out roughly 2”x 2” squares (or a square cookie cutter would be super easy if you
have one!).  These do NOT need to be exact… blankets are wavy and soft, not rigid, so they look totally fine even if they come out longer on one side or
askew.

10. Take your cupcakes back out of the fridge and drape each blanket over the “body” of chocolate chips or whatever you use.

11. Attach hands, dabbing the chin area of each head with a little water and sticking them on.

12. If you want to get fancy, add some little sprouts of hair to the babies or decorations to your baby blankets and tuck a Teddy Gram in with some of them!
You can use frosting or fondant for either.  I used little pieces of colored fondant rolled out into a tiny snake and then curled up and stuck on with water
for the hair and little dots of some leftover frosting to make different patterns on a couple of the blankets.

…Adorable!

Now, if you’ve lasted with me this long and have had a terrible go at the whole fondant thing, don’t you worry.  There is a different version of these in the
awesome Hello Cupcake! book that uses all candy and found foods.  They suggest a mini vanilla wafer for a head and a softened, rolled out Starburst for the blanket!  Interesting!  I haven’t tried it, but give it a shot if you are against fondant.

Finally, I’m going to let you in on a secret of professional looking cupcakes.  The cupcake wrapper is key.  They make any cupcake look fancy even if you’re frosting has turned out gloppy and weird and your cakes are all lopsided, and they can tie in your color scheme beautifully and easily.  They are getting to be a huge trend now as cupcakes are so hot these days.

They sell all kinds of cool wrappers in the bakeware aisle of craft stores now and people make and sell them on sites like etsy.com where you can even request specific colors and patterns to go with different occasions and parties.  If you have one of those awesome Cricut machines, you can make really cool ones really easily, with intricate designs, etc.  But if you’re like poor old me, you can make fairly basic ones out of cardstock and make devoted best friends help you cut them out when you need about 50 million of them for a special cupcake order (thanks, Shar!).  Here  is a template you can print out on the cardstock or construction paper of your choice (again from my beloved CakeCentral site — you can find everything there and the people are so kind to share it!).  It is really nice with a scalloped edge along the top, which you can freehand or use specialty scissors to create. The cutting out process is a pain, so if you are under a tight time frame, check out the expensive but totally lovely pre-made options on etsy and at the craft store.  In fact, check them out anyway, they’re so cool.

Alright, that is my 2 cents on cupcakes and my latest creation in honor of Miss Amelia!
Hope you enjoyed!

Zucchini Nut Cookies or Sandwiches…..

17 Aug

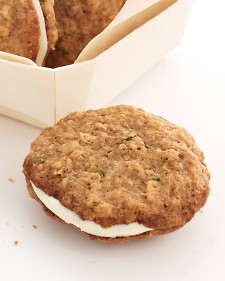
Yes, I stole this recipe.  I had originally found it in my Martha Stewart Magazine and thought it looked yummy.  To make someday.  So I cut it out so I can scan and save it on my computer (this is how I refrain from keeping all of my Southern Living and Martha Stewart Magazines!!).

And then I went to my friend Lara’s Thirty-One party last week.  She apparently also tore out the recipe, thinking it looked yummy.  But, she actually made them!!  And let me tell you, they were DELICIOUS.  And yes, they have zucchini in them.  So as far as I’m concerned that makes them healthy as well.  (Pay no attention to the amounts of sugar that go into them!!).  So healthy, in fact…that I have decided that they aren’t really cookies.  Maybe more of a muffin.   Hmmm….Zucchini Nut Muffin Sandwiches.  Now that sounds healthy!

Click on Martha’s link above if you want cookies, or look at my (slightly modified) recipe below if you’d like to think of them more as Muffin Sandwiches.  (no guilt required!)

Zucchini Nut Muffin Sandwiches 

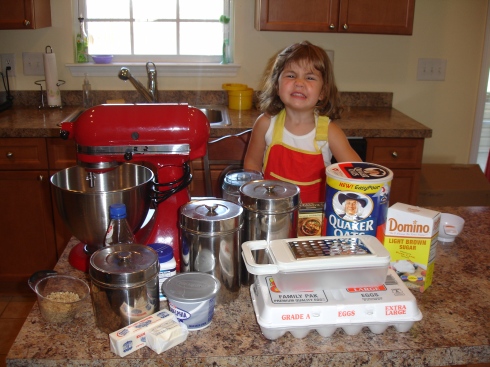
Ingredients: A lot of stuff (but don’t worry, you already have most of it!)

 
– 1 c all-purpose flour
– 1 1/4 tsp ground cinnamon
– 1/2 tsp baking soda
– 1/2 tsp baking powder
– 1/4 tsp coarse Kosher salt
– 1 1/2 sticks unsalted butter, divided and at room temperature
– 1/2 c granulated sugar
– 1/2 c packed light brown sugar
– 1 large egg
– 1/2 tsp pure vanilla extract
– 1 c finely grated zucchini
– 1 c old-fashioned rolled oats
– 1/2 c chopped walnuts
– 8 oz cream cheese at room temperature
– 1 c confectioner’s sugar, sifted
 

The Process

1. You will need two bowls, one big and one small.  In the smaller bowl, sift the flour, cinnamon, baking soda and powder, and salt.  In the larger bowl, beat 1 stick of the butter and the granulated and brown sugars until fluffy.  Add the egg and the vanilla.

 2. Pour the small bowl (with the flour mixture) slowly into the larger bowl, and mix until fluffy.  While that is happening, chop up your walnuts.

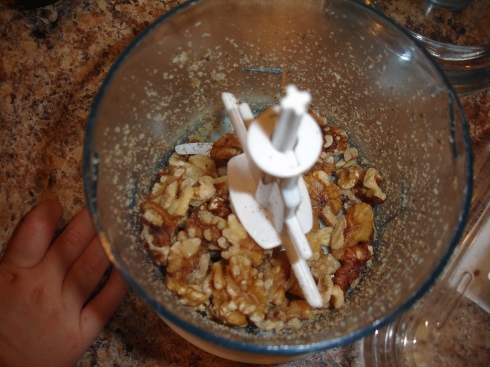
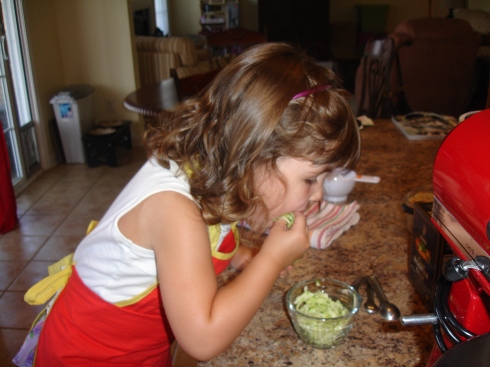
 I chopped them to small pieces….about 10 pulses in my processor.  I had a little helper who was anxious to help count and pulse!  Also, grate your zucchini.  As you can see below, I also roughly peeled them to eliminate as much green as I could from my finished product (for Dave’s sake!).  I grated up two medium ones, and that ended up being about twice as much as I needed.

So I separated it…since you only need a cup for the recipe.  I was planning on saving the extra cup of shredded zucchini for another recipe…

But a little someone beat me to it!

“Jayna!  What are you doing?!?!?!”

“I’m not doin’ nuthin’ mama!”

So much for extra zucchini!

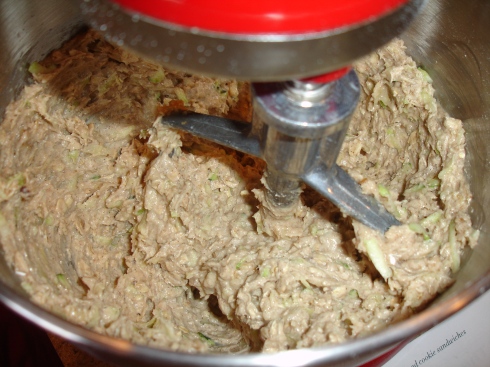
3. Mix the chopped nuts, the zucchini and your rolled oats into the mixture (everything should be in the big bowl now).

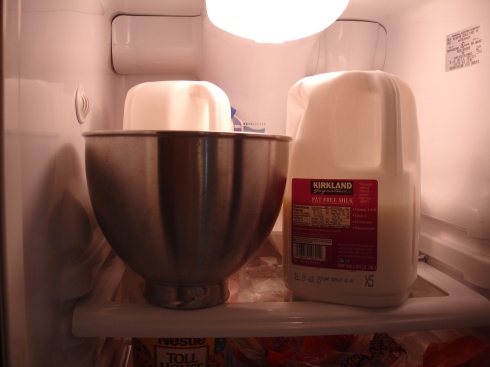
4. Refrigerate your bowl for about an hour to firm up the batter.

5. While your batter is firming, preheat the oven to 350 degrees.  Eat some more zucchini.

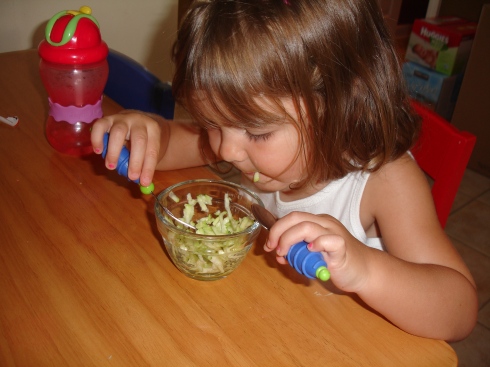
She told me she needed a fork AND a spoon so she could “scoop that zucchini up and not miss any piece.  To get it all!”

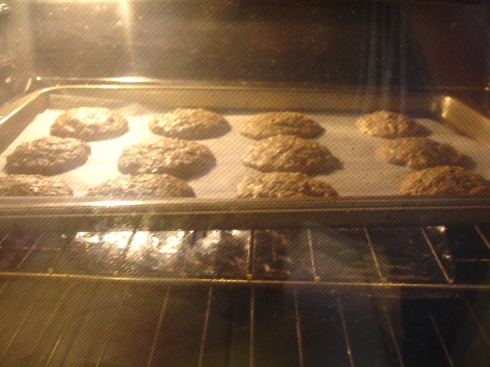
6. When your batter is firmer (after the hour or so), form it into about 1 inch balls and place on parchment paper on a cookie sheet about 2 inches apart.  Bake at 350 for 17 minutes or until edges are golden.  Remember that these are going to be (healthy) sandwiches, so make sure you end up with an even amount of cookies!

7. While all of your cookies are cooling on racks, make the icing.  Very healthy icing, of course.  Beat together the leftover 1/2 c butter, cream cheese and confectioner’s sugar until super smooth.

8. Using a knife (not an icing bag….as I found out the hard way!), spread the icing on half of the cookies, and then place another cookie on top, to create your very healthy sandwich.  Try to find cookies that are about the same size, unless you want messy fingers while you eat.  I was pretty conservative putting the icing on, thinking I may not have enough…..WRONG….I had plenty-so be liberal.  Generous.  After all, you don’t want these sandwiches to be TOO healthy!

9. Viola! Yumminess is complete!

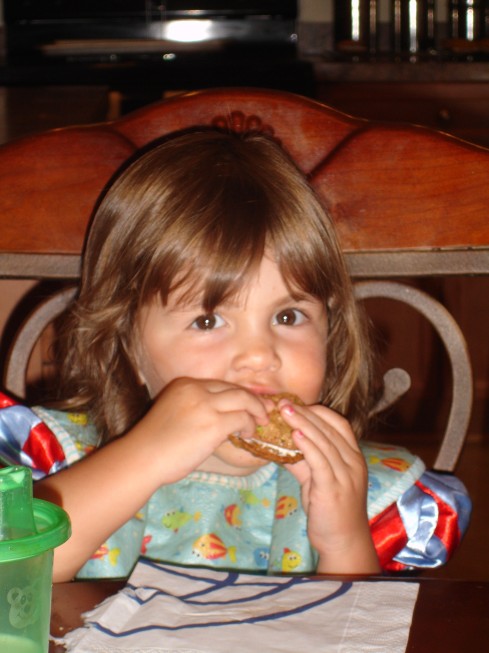
I stored mine in a ziplock bag….but they won’t stay there for long….

I particpated in these linky parties today:

NightOwlCrafting

Strictly Homemade Tuesday

Nothing But Country

Sumo's Sweet Stuff

Night Owl

31 Jul

Yes, your time stamp is correct.  It is currently 2:27 am and I am wide awake.  As in doing laundry, eating a bowl of Cinnamon Toast Crunch, watching infomercials, and contemplating sewing some burp cloths wide awake.  I decided against sewing as my machine is probably too loud for 2:30am.  Instead, I’ve been updating my Pinterest account. AKA web surfing.  I decided to add it to my blog, so you can see what I’ve been finding on my late night mission! It is right under my title, in between the ABOUT ME tab and the RSS feed (which is another way to follow me, by the way!).

If you are too lazy to click on that, or you don’t have a pinterest account….here is a little sneak peek:

 Thanks to  Joy’s Hope

So sue me…I have babies on the brain (and most of the time on my bladder too!).  I love the idea of the cover to protect her from prying eyes and sticky fingers!  Just need to find a pattern now….

Thanks to Go Vegan Meow!

Doesn’t this 7 layer dip look yummy?  This is pretty much our go-to appetizer to bring to any function, with a couple of twists on the recipe it looks like.  But I have never seen it made in individual servings…why didn’t I think of that?!?!?

Thanks to Two Friends, Two Cities 

How beautiful is this? ‘Nuff said!

Thanks to Miss Lovie 

For some reason, I have been into crafty wreaths lately.  It’s probably my off-shoot of recent obsessions with front doors as well.  Or maybe its just how I’m nesting lately!  I really like this one, and feel like I could totally make that!!

Ok, check out my Pinterest boards to see more eye candy!  In the meantime, I’m going to switch the laundry and maybe bake some cookies!

Tennessee, Part 3: Smoky Mountain Seven Layer Dip and Black Bears

15 Jun

Day Four: Tuesday

This is what we woke up to on our deck this morning.  It is officially bear season…..

Today we decided to explore the craft shops on the Arts and Crafts Trail in Gatlinburg (we stayed right off of the trail, so we passed the shops everyday, our curiosity increasing each time!).  Didn’t take a ton of pictures, but we did stumble across a super cute (and soooo yummy since it was soooo hot) old fashioned soda fountain shop….where we enjoyed the nostalgia covering the walls and root beer/cherry coke floats!

That night, Dave grilled some chicken on the deck (while Jayna supervised) and we finished up the leftover pecan pie and chocolate cake from the Old Mill Restaurant.

Late that night, we heard a visitor on our porch again….

Alas, no bears getting into our garbage….just a pesky raccoon.  But it was still enough to set us on edge from that night on!  Every bump in the night that we heard, we woke up!  But after the raccoon ate all of our garbage (and we started taking our trash to the dump to deter him), the only wildlife we saw at our house was…

and…

Jayna saw a couple of rabbits, and we encountered a groundhog or two….but none of the above seemed to concern Maggie-what a ferocious watchdog!

Yet, as I type this she is pacing between our dining room windows and the living room, whining and growling because our neighbor three doors down closed his car door.  Go figure! =)

Day Five: Wednesday

Today we went into Pigeon Forge hunting for a rustic furniture warehouse that we had heard about in Gatlinburg.  After passing through downtown Pigeon Forge, which is the mountain version of Myrtle Beach…complete with Go Kart tracks, chain restaurants and Putt Putt on every corner, we finally found the shop!  It was not air-conditioned, but had some beautiful furniture…..if only we owned a log cabin!  Mostly Aspen carved bedframes and furniture, which would not fit with our Charleston home….but we did find a couple of cute accent pieces….


And Jayna had her head set on taking this bear home….Needless to say, we did not.  We did however adopt a fur-covered palm-sized baby bear replica, courtesy of the sales lady who thought Jayna was O-So-Adorable.  I was creeped out by it, and it shedded all over the place….so when his nose accidently fell off, I took full advantage of returning that baby bear to the mountains, via the garbage can.  Shhh…don’t tell Jayna, she hasn’t even noticed yet!

While in Pigeon Forge, we stopped at the visitor’s center to inquire about the Synchronized Firefly show in the Smoky Mountains National Park.  Apparently, for a week in June every year, the fireflies gather in the national park to mate….however, they blink their lights together, causing the night sky and dark woods to light up with millions of little glowing bugs for up to 12 seconds at a time!  And they all do it together!  It’s supposed to be amazing.  However, when I asked about it at the visitor’s center, the lady told me we’d have to catch a trolley from the National Park Visitor’s center up to the woods where it happens between 6:30 and 7….and then wait until 9:30-10 when the bugs come out and its completely dark.  Oh yeah, and to make sure we had chairs and flashlights (which we didn’t have), because apparently it is PITCH black up there, and you’ll want to sit down and wait.  And wait.  And wait.  So, as cool as it sounded, I’m not sure how well a two-year old would do arriving right at bedtime, waiting for the pitch black dark, waiting for two hours past her bed time, all to be surrounded by bugs (and that’s not even counting the mosquitos!!).  So……pass.  But here’s a picture I found on Google from someone who would have captured the phenomenom much better anyway!

During naptime, Dave decided to make his mom’s famous Seven Layer Tex Mex Dip….but we were in the Smokies, sooooo…

Sue Sue’s Smoky Mountain Seven Layer Dip

Layer, (bottom to top) in this order, in a 9X13 inch pan

1.  8oz of sour cream (original, not light or fat free) and 8oz cream cheese (original) after blending

2. Pace salsa

3. 1 can of refried beans….heat in the microwave for about a minute first and then chunk into the pan before spreading….this can be the trickiest step!

4. Chopped black olives (we don’t like olives, so we skip this step)

5. Chopped green onions evenly sprinkled over bean layer

6. Seeded and chopped tomato sprinkled with green onions over bean layer (we usually sprinkle onions and tomatoes together so they are evenly distributed)

7. Shredded Mexican Blend of cheese over top

Eat with any sturdy chip….although we are adamant that Frito Scoops are the best with it!  And as far as we’re concerned, we’ve got all the major food groups, so go ahead and call it a meal! =)

UPDATE: Like what you just read? Want more?  Check out the rest of the Tennessee story! Click on one of the links below:

Do You Hear Banjo Music?
Adventures of Running Bear
Tennessee Part 1: Mountain Mama
Tennessee Part 2: For Betsy and Jay
Tennessee Part 4: White Lightening and Black Light Golf

Chicken Parmesan Bundles Recipe

19 May

My good friend Ashley and I had a blast on Tuesday night at the annual Taste of Home Cooking Show.  It was held at a local college chapel, and we spent $11 and got a girls night out, a free demo of 12 recipes, and a reusable bag full of coupons and kitchen gadgets.  The only downside of the evening was the 2,357 prizes they gave away, and despite there only being about 200 people at the show, somehow neither Ashley nor I won ANYTHING!  We were both losers!  But, we had a good time anyway, and I guess it will teach us to arrive earlier next year!

Tonight I decided to try the Chicken Parmesan Bundles (which are on page 38 of the Taste of Home Cooking School magazine in which we recieved in our goody bags).  Although mine were not nearly as pretty as their picture, they ended up turning out pretty tasty!  Here’s the recipe, modified as I made it, if you’d like to try it:

Chicken Parmesan Bundles

1. Heat oven to 375 degrees.  Mix 4 oz of softened Philadelphia Cream Cheese, 10 oz chopped spinach, 1 cup of shredded mozzarella cheese and 3 Tbsp of grated Parmesan Cheese in a blender until it has the consistency of paste.

2. Spread the paste onto 6 bonless skinless chicken breasts that have been pounded to 1/4 inch thickness. (I only used 4 breasts, and had TONS of the paste left over….probably could have even halved the recipe for 4 breasts).

3. Starting at the short end, roll up each chicken breast tightly and secure with wooden toothpicks.

4. Beat 1 egg in a separate bowl.  Mix another 3 Tbsp grated Parmesan cheese with 1/2 cup of crushed butter-flavored crackers (about 10) in yet another separate bowl.

5. Dip the chicken rolls in the egg bowl, covering thoroughly, and then coat with the cracker/cheese mixture.  Place seam-side down in a 13X9 inch baking pan, sprayed with Pam.

6.  Bake for 30 minutes or until chicken is done.  Remember to remove toothpicks before eating!  Top cooked chicken with a drizzle of marinara sauce (you will need 1/2-1 cup total) and another 1/4 cup mozzarella (divided amongst tops of all the chicken).

7. Like I said before, I ended up stuffing my chicken breasts too much, and they ended up kind of exploding with cheesy goodness.  Not pretty to look at, but so yummy!  Here’s a picture of them right out of the oven, before I had a chance to top with the marinara or extra cheese.  Enjoy!