Tag Archives: Linky Parties

Scrap Quilt

25 Jan

I’ve been sewing for about a year now, and have no real craft area.  Everything is kept in Tupperware tubs in a giant armoire.  So, needless to say, I was overflowing with little scraps of fabric.  Time to do something with those little pieces.  Because they were kind of all in one color family (pinks, browns, turquoise and green), but all different sizes, I decided to try my hand at a scrap quilt.

Don’t get me wrong….I can appreciate the design and hard work that quilters put into their creations.  But I have no desire to become a quilter.  In fact, I can barely call myself a sewer……so I needed to be able to do this simply and quickly.

So I cut up my fabric into different size pieces, using several pieces of cardboard as my templates to trace.  I had a quilt panel in my pile of random fabrics, but like I said….I have no intention of quilting.  So I cut it up instead, cutting the characters from the quilt panel into the largest squares, and then using the surrounding patterns as smaller parts.  I used strips of the fabrics as the borders too.  And to be honest, I did this completely by trial and error….I had no idea what I was doing.  But, I figured it was a scrap quilt, so the more hodgepodged it looked, the better.

Bear with me…..here’s how I did it:

Materials:
thirty 6 1/2 inch squares
sixty 3 1/2 inch squares
seven strips of 45 1/2 inches worth of fabric…..with each strip being 2 inches wide….and having 1/4 inch of seam allowance on each end
one large piece of fabric 47 inches by 45 1/2 inches
1 piece of quilt batting measuring 46 1/2 inches by 45 inches

I had a big scrap of padding….so I folded a corner over to form a square and cut off the excess ( I think it ended up being about 46 square inches)

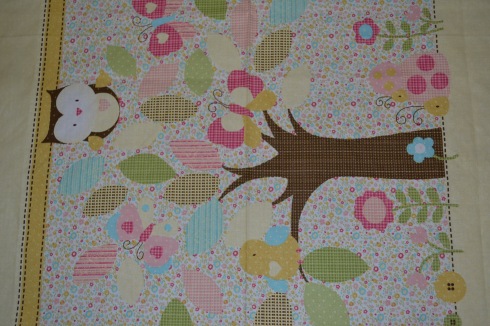
This was one of the spare pieces of fabric I had that I loved, but wasn’t sure what to do with….so I cut it up to use as my focus squares on my quilt.

I measured all of the little critters on the panel, and luckily they all were about 6″….so I decided to make my larger squares that size (when finished).

I used a piece of cardboard as my template to cut around.  (I made three templates…a 6 1/2″ square, a 3 1/2″ square and a 2″ wide strip….length doesn’t really matter…..all seam allowances for this project are 1/4″)

 There were large chunks of interesting patterns left after I cut out the critters, so I supplemented more 6 1/2″ squares with them (and other fabric I had), and also used them for my smaller squares (which ended up being 3 1/2″ squares).  If you look carefully, you can see where I drew my lines using a washable fabric pen.  All of my seam allowances were 1/4″.

I also cut 2″ strips from scraps (varying lengths) to use as my borders.  Then I laid everything out on top of my batting.  I wasn’t too concerned about it fitting exactly, but I wanted to make sure that it was at least as wide as the batting….I ended up trimming excess at the end of my project.  I also cut out one large piece of fabric to be the back of the quilt…..measure it to be the same size as your batting, and then add a 1/2″ around the edges to account for the seam.

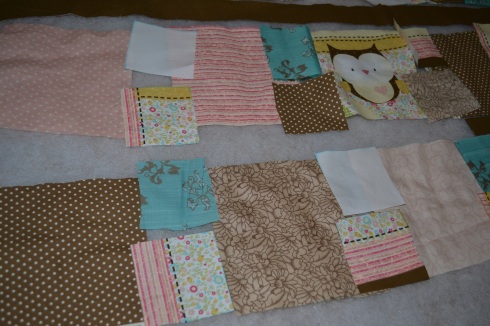
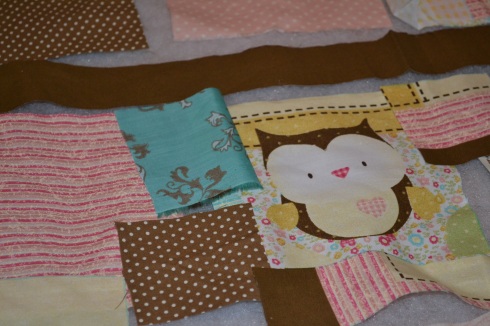
Lay out your whole quilt…..I alternated one 6 1/2″ square and then two 3 1/2″ squares across, and then a 2″ strip in between each of the square rows.  Just keep cutting scraps until your quilt is filled!  I arranged mine on top of my batting to make sure it was big enough, and so I could get a visual on where all of the pieces were going to go.

 I wanted to make sure that each of my fabrics were spaced out, and no two same patterns were touching.  I also had to watch the spacing of my green and turquoise pieces because they totally clashed together….but spread out against the other patterns looked nice and were great bursts of color!

Time to sew!
Since there were going to be two 3 1/2″ pieces in between every 6 1/2″ piece….I needed to sew those together first.

I started to pin everything together before sewing….and quickly gave up.  So much easier just to hold it in place as I sewed!

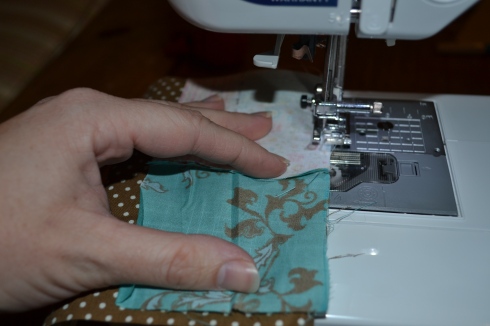
Take your two 3 1/2″ pieces and place them right sides touching, raw sides together.  Make sure you know which edge to sew (based on the two 6 1/2″ squares it will be touching….pay attention to color and pattern placement).

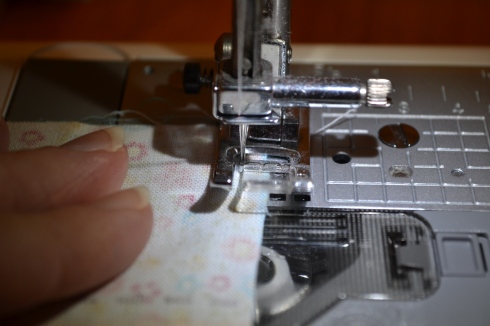
Sew the two pieces together with a 1/4″ seam…do a quick backstitch at the beginning and end to tack the ends.

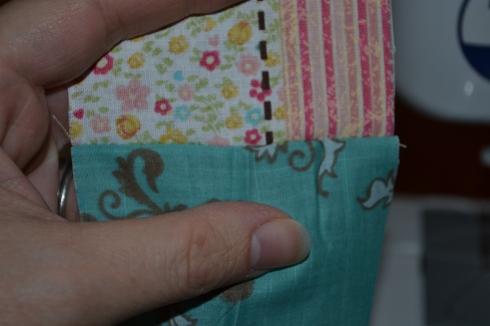
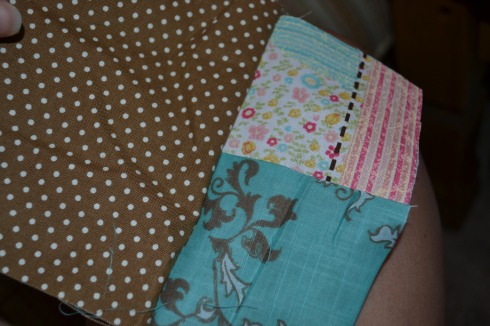
Here’s what the seam should look like on the right side.  Sew all of your pairs of 3 1/2″ squares together…but keep them placed out on your quilt so you know which direction they should go (again, watch your colors and patterns!).

Line up the raw edges of the 6 1/2″ square and the two (sewn together) 3 1/2″ squares….right sides touching.

Sew 1/4″ seams, and backstitch.

Here’s what it should look like.

Sew on the next pair of 3 1/2″ squares to the other side of your 6 1/2″ square and continue to the end of the row.

Here’s the first row I completed….you can see I didn’t follow my own advice about really watching my placement and which sides I was supposed to be stitching together….my snail was sideways!  I had to undo the stitching on both sides of that square, turn it, and redo it!

Do the same with your 2″ border strips.  Sew them all together-end to end with 1/4″ seams.  Then place them right sides together with your square strips, raw edges touching.  Sew a straight line down the whole strip (1/4″ seam), and backstitch at beginning and end. Once you do this to all of your strips, your quilt will be all in one piece….very satisfying to see it all come together!

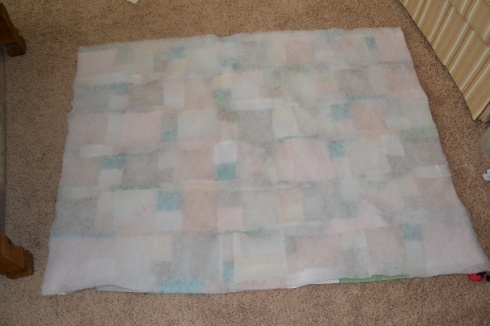
I pinned the right sides of my quilt and the fabric for the back together.  I layered the batting on top of the quilt back and pinned it.

Ok, so I forgot to take pictures of these next couple of steps (sorry!), but they were pretty easy:

-I sewed all the way around (1/4″ seam), making sure to get the batting into the seam as well.  I left a 6-8 inch opening on one end so I could turn everything right-side out.

-Carefully stuff everything through the hole so that your quilt is facing right-side out.  At the hole, fold the raw edges under (and pin if necessary) and sew closed.  I use an 1/8″ seam allowance to sew it closed…..and then I keep going all the way around the edge of the finished quilt.  Then, I sew another stitch at a 1/4″ in from the edge….all the way around to give it a nice finished look.

Then I sewed along the right hand side of each of the strips of fabric in order to keep the batting in place.  I spread out the seam and used a light pink thread since it matched much of my fabric color and was light enough to be seen on the back of the quilt (my fabric was a yellow and white gingham on the back)

Done!

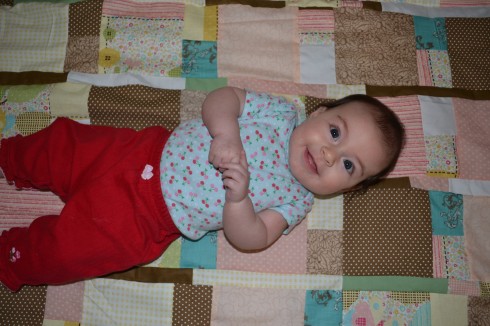
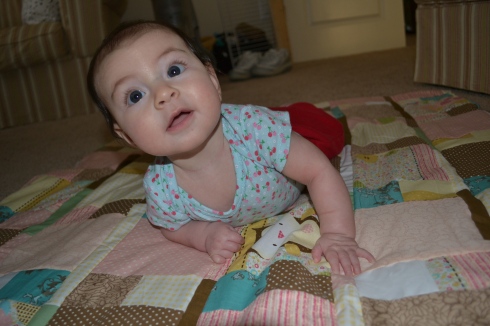
And she loves it!

Room for two!

P.S. Here’s where I’m linking up!

Christmas Yarn Ball Wreath

22 Dec

It’s been a hand-made Christmas this year for me….well, decoration-wise anyway.  With a new house comes a craving for new decor.  So, inspired by Pinterest and my fellow bloggers (and a little bit of Martha Stewart!), I set out to create.  One project was a new wreath for our porch door.  I made a burlap fall wreath, but obviously it was time to replace that.  I found this cute little number on Pinterest, and decided to try to replicate it.

Here’s how I did it:

I bought red and white yarn, and a spool of jute (twine), and a wreath form.  You’ll also need thick ribbon, scissors and hot glue.  I cut each page of the newspaper into quarters, and then crumpled them into balls.

I decided that the base of my wreath was going to be red, so I tied a knot around the wreath form at the seam and slowly wound the yarn around it, being careful not to overlap and to keep the yarn tight.

When I reached the end, I just tucked the yarn under….not very sturdy, but I’d be glueing on my ribbon holder on top, so it’s ok.

I secured one end of my ribbon where I had tucked the end of the yarn, using hot glue.  Do not secure the other end of the ribbon yet.

Then, with a second piece of ribbon, I formed a loop and hot glued it on top of the yarn and the already glued down part of the ribbon.

Then I took the first ribbon and wrapped it over the second loop and secured with hot glue.

Moving on to the yarn balls.  Just wrap them tightly around the newspaper balls.  You want the newspaper to be completely covered, and its ok that the balls are slightly different sizes.  I made about 22 of the red and white, and 8 of the twine.  Even though technically I am finished with my wreath, I still may go back and add some more balls to the sides and top to give it some more depth and bulk.  You can always add more, so I’d start with just 20 or so.  Find something good on TV because these take awhile!

Jayna decided she wanted to help wrap some balls too…..I’m thinking her fine motor skills aren’t quite there yet, what do you think?

But she was ok, she settled for naming her new baby “Yarnie” and toting it aroudn with Pink Baby.

Ready to glue on!

Start slowly, and layer as you go.  Remember that there is newspaper in the middle, so the balls can kind of be squished to fit where you need them.

Tada!  Great, bright addition to our living room!  And because I only used red, white and natural colors…I feel like I can leave it up through the winter…not so Christmas-y!

See on the left hand side where you can still see some of the red yarned wreath form?  That’s where I will probably end up adding a few more….you know, in my spare time!

I’m linking up here this week!

Albuquerque was a Turkey

17 Nov

I’m not sure what the rest of the words to this song are….all I know is that Jayna is singing it in her Thanksgiving Program at school next week, it is sung to the tune of “Clementine,” and Jayna only knows one line of the song.  And that one line is subsequently in my head ALL of the time!

So, in honor of Mr. Albuquerque the Turkey, I made some cake pops in the shape of turkeys for our Sunday School Thanksgiving Dinner….also known as our Meat and Skeet.  We all bring our favorite Thanksgiving Day sides and desserts and gather at our friends Lisa and Jordan’s house to fry up some turkeys, shoot some skeet and visit.  It’s always a good time, and a great way to kick off the holiday season.

While we were there, Jayna used the rest room and then promptly told me that “Ms. Lisa’s toilet paper is sooooooo soft!”  When she told Ms. Lisa how much she loved her toilet paper, Ms. Lisa let her take home a roll!

And now for my turkeys.  At first, I was skeptical, but after they were finished, I decided they really were quite cute!

I started to draw eyes and little pointy beaks on them….but then decided that the beaks looked like smiley faces and they looked kind of dumb.  So half of them had faces and half did not.  They all got gobblers though! (Made out of little colored chocolate pieces I found at Party City).

The heads were made from the all chocolate M&M’s….they are slightly bigger than regular M&M’s and the whole pack is brown!  No more digging through the colored bags!  The heads were held on with a dab of melted chocolate.

Tail feathers were made from “Indian Candy Corn” and held on by a dab of melted chocolate.  Feet were the ends of pretzel sticks stuck into the melted chocolate as soon as I dipped the balls in chocolate.

They were a little more involved to make, but a terrific hit at the party….they were gone so fast that I didn’t even have a chance to photograph them on the table!!

Here’s where I’m linking up this week!

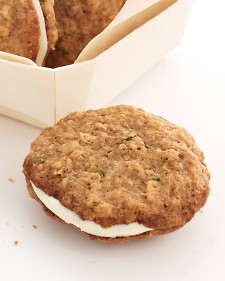
Zucchini Nut Cookies or Sandwiches…..

17 Aug

Yes, I stole this recipe.  I had originally found it in my Martha Stewart Magazine and thought it looked yummy.  To make someday.  So I cut it out so I can scan and save it on my computer (this is how I refrain from keeping all of my Southern Living and Martha Stewart Magazines!!).

And then I went to my friend Lara’s Thirty-One party last week.  She apparently also tore out the recipe, thinking it looked yummy.  But, she actually made them!!  And let me tell you, they were DELICIOUS.  And yes, they have zucchini in them.  So as far as I’m concerned that makes them healthy as well.  (Pay no attention to the amounts of sugar that go into them!!).  So healthy, in fact…that I have decided that they aren’t really cookies.  Maybe more of a muffin.   Hmmm….Zucchini Nut Muffin Sandwiches.  Now that sounds healthy!

Click on Martha’s link above if you want cookies, or look at my (slightly modified) recipe below if you’d like to think of them more as Muffin Sandwiches.  (no guilt required!)

Zucchini Nut Muffin Sandwiches 

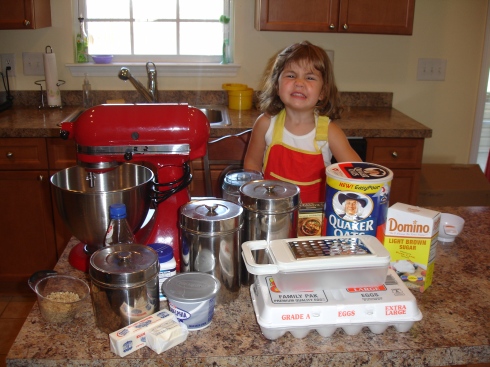
Ingredients: A lot of stuff (but don’t worry, you already have most of it!)

 
– 1 c all-purpose flour
– 1 1/4 tsp ground cinnamon
– 1/2 tsp baking soda
– 1/2 tsp baking powder
– 1/4 tsp coarse Kosher salt
– 1 1/2 sticks unsalted butter, divided and at room temperature
– 1/2 c granulated sugar
– 1/2 c packed light brown sugar
– 1 large egg
– 1/2 tsp pure vanilla extract
– 1 c finely grated zucchini
– 1 c old-fashioned rolled oats
– 1/2 c chopped walnuts
– 8 oz cream cheese at room temperature
– 1 c confectioner’s sugar, sifted
 

The Process

1. You will need two bowls, one big and one small.  In the smaller bowl, sift the flour, cinnamon, baking soda and powder, and salt.  In the larger bowl, beat 1 stick of the butter and the granulated and brown sugars until fluffy.  Add the egg and the vanilla.

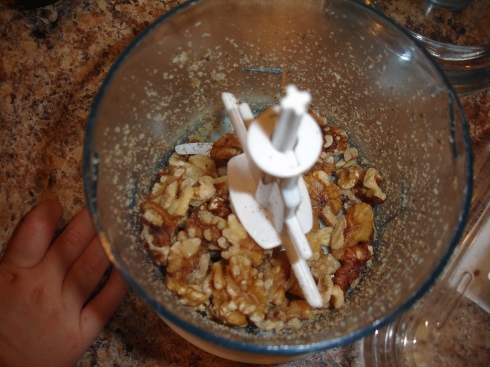
 2. Pour the small bowl (with the flour mixture) slowly into the larger bowl, and mix until fluffy.  While that is happening, chop up your walnuts.

 I chopped them to small pieces….about 10 pulses in my processor.  I had a little helper who was anxious to help count and pulse!  Also, grate your zucchini.  As you can see below, I also roughly peeled them to eliminate as much green as I could from my finished product (for Dave’s sake!).  I grated up two medium ones, and that ended up being about twice as much as I needed.

So I separated it…since you only need a cup for the recipe.  I was planning on saving the extra cup of shredded zucchini for another recipe…

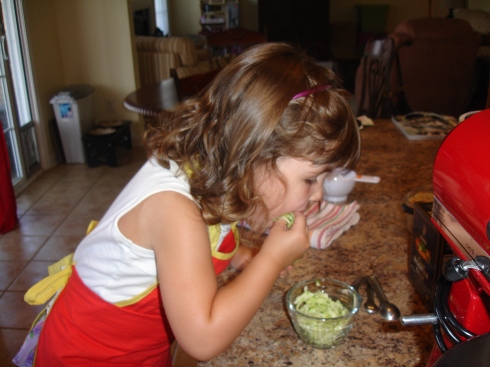
But a little someone beat me to it!

“Jayna!  What are you doing?!?!?!”

“I’m not doin’ nuthin’ mama!”

So much for extra zucchini!

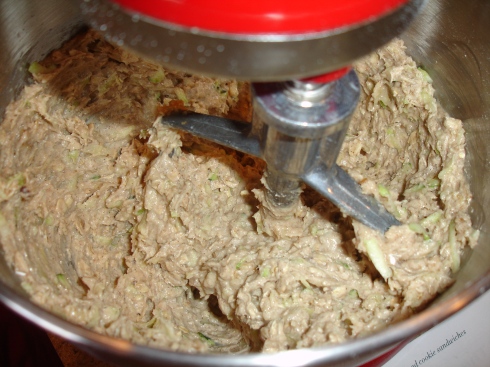
3. Mix the chopped nuts, the zucchini and your rolled oats into the mixture (everything should be in the big bowl now).

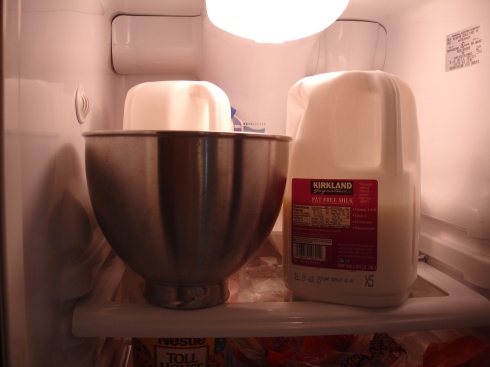
4. Refrigerate your bowl for about an hour to firm up the batter.

5. While your batter is firming, preheat the oven to 350 degrees.  Eat some more zucchini.

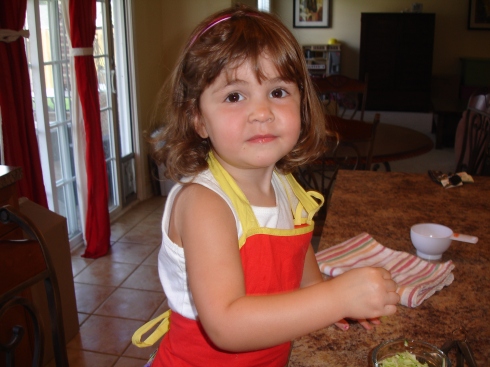
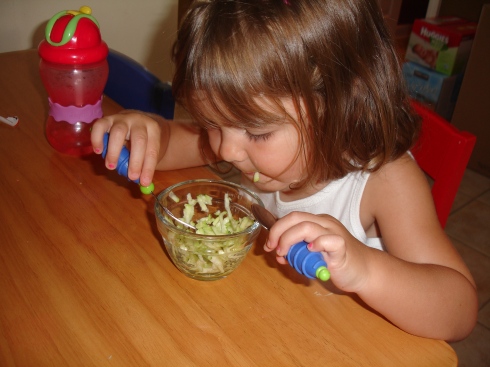
She told me she needed a fork AND a spoon so she could “scoop that zucchini up and not miss any piece.  To get it all!”

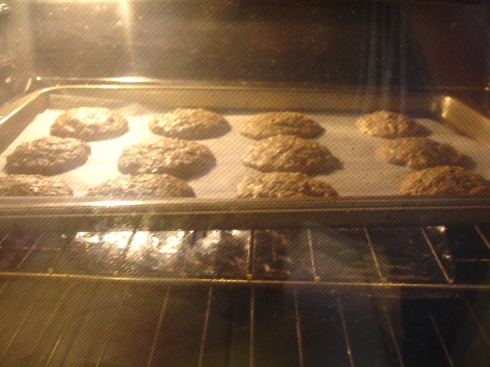
6. When your batter is firmer (after the hour or so), form it into about 1 inch balls and place on parchment paper on a cookie sheet about 2 inches apart.  Bake at 350 for 17 minutes or until edges are golden.  Remember that these are going to be (healthy) sandwiches, so make sure you end up with an even amount of cookies!

7. While all of your cookies are cooling on racks, make the icing.  Very healthy icing, of course.  Beat together the leftover 1/2 c butter, cream cheese and confectioner’s sugar until super smooth.

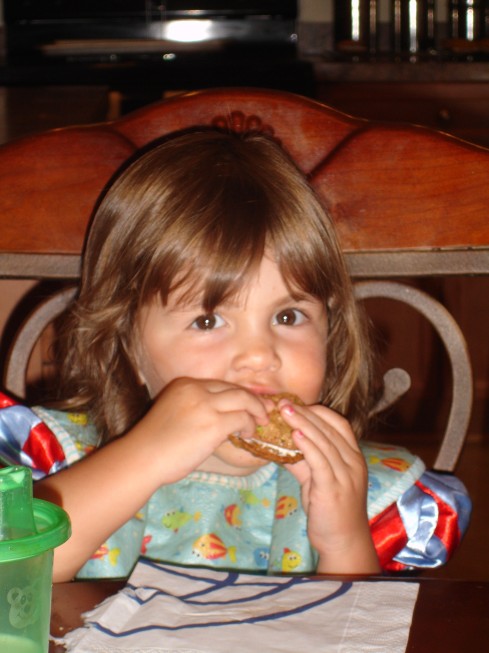
8. Using a knife (not an icing bag….as I found out the hard way!), spread the icing on half of the cookies, and then place another cookie on top, to create your very healthy sandwich.  Try to find cookies that are about the same size, unless you want messy fingers while you eat.  I was pretty conservative putting the icing on, thinking I may not have enough…..WRONG….I had plenty-so be liberal.  Generous.  After all, you don’t want these sandwiches to be TOO healthy!

9. Viola! Yumminess is complete!

I stored mine in a ziplock bag….but they won’t stay there for long….

I particpated in these linky parties today:

NightOwlCrafting

Strictly Homemade Tuesday

Nothing But Country

Sumo's Sweet Stuff

Newborn Matching Outfit

3 Aug

Good morning!  We are so excited today because it is our last day of swim lessons!  Don’t get me wrong….we love to swim.  But unfortunately the swim lessons we enrolled in were less than stellar and have messed with our whole schedule the past two and a half weeks.  They were from 12-1 (naptime) and were a half an hour away from our house.  I didn’t even take any pictures because the pool was disgusting!  The swim lessons teacher was 16 years old and purely a lifeguard, while the three of us moms fended for ourselves attempting to teach our kids…not even knowing where to start!  But I’m happy to report that Jayna is able to dunk her head under water while blowing bubbles, paddle with arms and feet while I hold her around the waist, and jump off the side to me!  That’s about all we could handle without any direction!  But, I can’t complain because we only paid $30 for the whole session…but needless to say, we’ll be swimming elsewhere from now on!

In other news, I spent the evening completing a bundle of burp cloths (in between Braxton Hicks contractions!).  I also decided that I’d like to splurge on some in-hospital professional pictures of Amelia and Jayna.  So of course we’ll need matching outfits for them!  I decided to complete the set I made for Jayna and Lulabelle, with a little onsie, burp cloth and bib for Amelia.

I started with the burp cloth, and made it like I usually do by cutting the fabric and the flannel to the size I wanted and matching up the wrong sides and sewing together.

I also like to sew a double seam for durability.

And I also fold it into thirds, iron the creases, and then sew a single stitch down each crease.  This helps with bunching when you wash it, and gives you a little guide to fold it.

Then I decided that a pillowcase dress was unrealistic for a newborn, and a onsie would be better.  I hand drew a daisy on the fabric, used an iron-on transfer to get it to stick to the onsie, and then I hand-sewed red stitches around it.  I was aiming for it to look a little ragged…I think I succeeded!

And finally, I decided to add a bib to the outfit.  I traced a newborn bib that I already had to get the size and pattern right, and then added another inch around the edge to account for the seams.  I matched the right side of the fabric to two layers of flannel, and placed piping around the raw edges.  I sewed around the piping before layering the back of the bib (fabric again, with the right sides together), and then sewed over my original stitching.  Don’t forget to leave a 2-3 inch opening so you are able to turn the bib right-side out!

Then I added velcro.

And tada!  A super absorbent spit bib for a newborn!

All in all, I’m pretty pleased with the way they came out, and can’t wait to see how the pictures come out when Amelia arrives!

P.S. I linked up with these linky parties today…take some time to check out what other people have been working on this week!

Photobucket

Strictly Homemade Tuesday

Nothing But Country

Photobucket

NightOwlCrafting

Photobucket

Homemade Burp Cloths

27 Jul

Howdy y’all!

Since I have to pack boxes instead of nesting to prepare for Baby Amelia’s arrival, I decided to kill two birds with one stone this week and get rid of some scrap fabric and fat quarters I had lying around and make Amelia some new burp cloths!  I love how fat quarters come in coordinating patterns and colors, and I can usually make 10 out of them for about $10.  Sometimes I’ll do one burp cloth and a matching bib too.  A super easy (and quick) handmade gift for an ALWAYS appreciative Mommy-to-be!  Here are a couple of sets I’ve made recently, some to keep and some to give away!

Hope you enjoyed!  Come back tomorrow to see how else we have been preparing for Baby Amelia!

Today I joined Night Owl Crafting’s Linky Party…..click on the icon below to see what everyone else has been working on this week.

NightOwlCrafting

Betsy…check out #64 Zoo Animal Cupcakes

Mom Mom…check out #97 Grilled Pizza

Love y’all!